How to Build an Inexpensive Hoop-Style Greenhouse
One of the most valuable assets in my garden is my greenhouse. It has allowed me to grow plants that I normally would not be able to grow, produce crops that the season is not usually long enough to produce, and protect my plants from frosts, hail, or other severe weather that normally would have destroyed my garden.
But I don’t have thousands of dollars to spend on a greenhouse. I just priced out an 8’x12’ greenhouse for $3,500. I would love to have a large, professional greenhouse, but that simply isn’t financially feasible for me. So, instead I’ve found a way to make a large greenhouse that is functional, easy to build, and inexpensive. This article will explain to you exactly how to build a 12’x32’ hoop-style greenhouse for under $400.
Required Materials List
Note: All wood should be green, treated wood to resist rot. (Or you can spend more money and buy a rot resistant type of lumber such as cedar.)
- (4) 2×6 – 16’
- (2) 2×6 – 12’
- (14) 2×4 – 12’
- (19) ¾” x 20’white pvc pipe
- (9) 10mm x 10’ rebar
- (1) 20’x50’ roll of 6mm plastic
- (1) Bundle of 50 4’ wood lathe (or optional staples)
- Zip ties
- Nails or screws
- Metal banding
- Door hinges and handles
Step 1 – Laying Out the Frame
Using the 2x6s, lay out and put together your 12’x32’ frame. (You can join the two 16’ pieces with a 2’ piece of 2×4.)
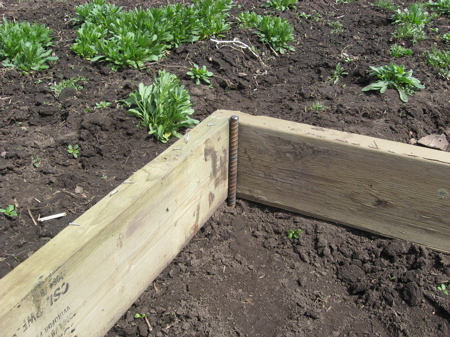
Ensure that the frame is square by measuring diagonally across it. You can temporarily keep the frame in place by pounding a 30” piece of rebar in each corner. (You can pull these out to use them in the next step.)
Step 2 – Adding the Hoops
Cut each 10’ piece of rebar into four 30” pieces of rebar. This will give you thirty-four pieces. Pound the rebar into the ground about 15” deep on the outside of your frame at two foot intervals. This will leave 15” sticking up out of the ground.
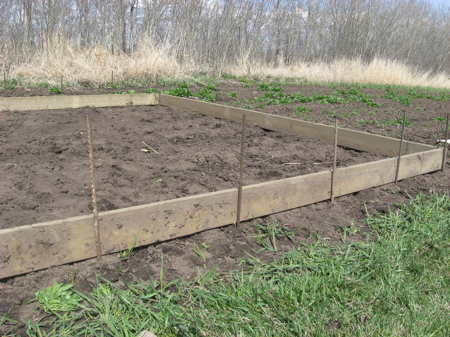
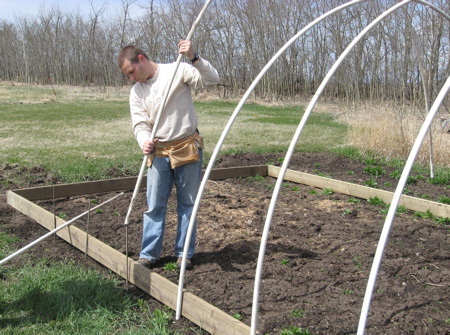
Now slide both ends of your pvc pipe over the rebar to make a hoop across the width of your greenhouse.
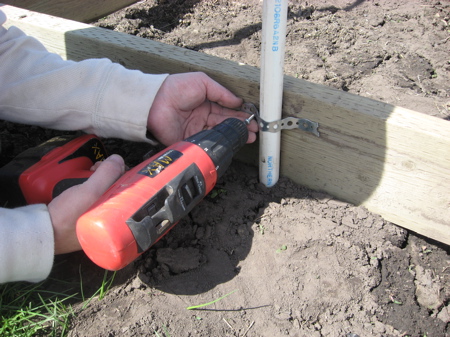
Attach the pvc pipe to the 2x6s by screwing short pieces of metal banding around the pipe.
Step 3 – Building the Ends
Cut the following pieces out of your 12’ 2x4s:
- (2) 11’8¾”
- (4) 1’6″
- (4) 4’7″
- (4) 5’7″
- (8) 1’11¼”
- (2) 4′¼”
For each end, assemble the wall according to the following diagram.
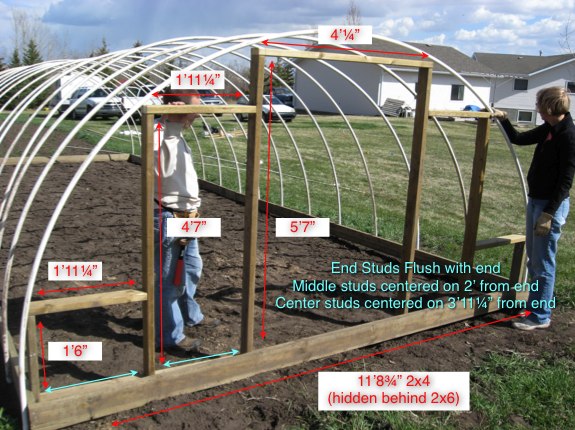
Place this wall within the 2×6 frame and nail/screw in place.
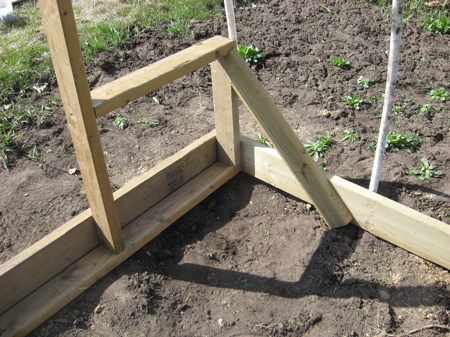
Cut (4) 28” 2×4 pieces. Cut one end at a 45º angle. Use these pieces to brace the wall.
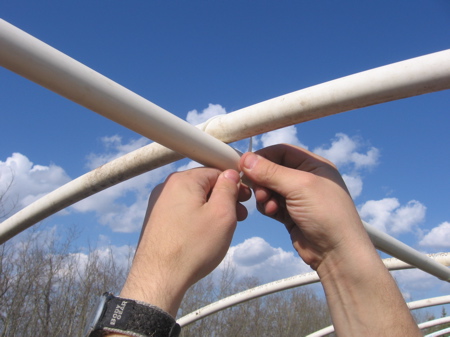
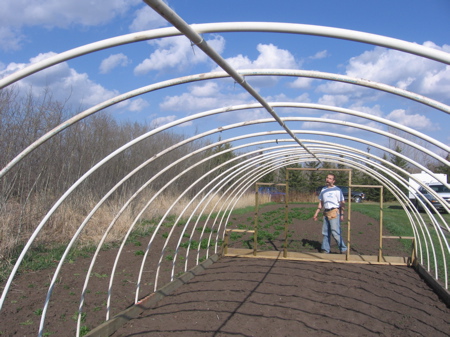
Once all of the hoops and the two ends are in place, connect two pvc pipes together and cut them to measure 32′ long. This will be the rib that will go along the top of your hoops. You can attach this rib with plastic zip ties.
Step 4 – Covering the Greenhouse with Plastic
If you are going to use wood lathe, cut 32 pieces of 20” lathe. These will secure the plastic to the sides of the 2×6 frame in between each hoop. Or optionally, you can use staples, though they may have a tendency to pull through the plastic.
Drape the plastic over the length of the greenhouse. Be sure to have enough overlap at the ends to cover the end walls. Pull the plastic snug and attach to the 2x6s at one end using the wood lathe or staples. Go to the other end, pull snug, and attach in a similar manner. Do this at the center, and then along the rest of the length of the greenhouse.
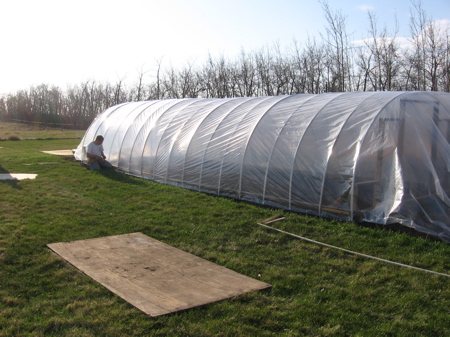
Note: If you can do this in warm weather, there will be less sagging later. Make it as snug as you can without causing damage to the plastic.
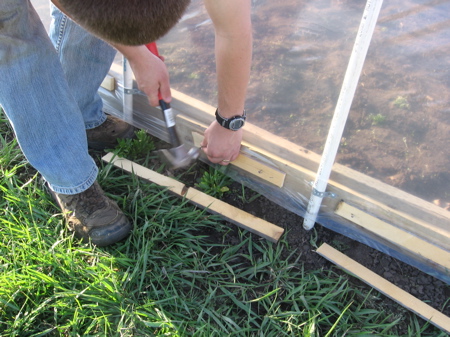
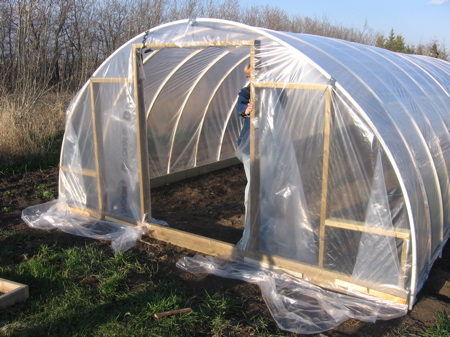
To attach the plastic to the ends, pull the plastic straight down, and attach with lathe. Then pull the plastic out to the sides. This will give you extra plastic along the outside edge. Fold the plastic back towards the center and attach. For the end with the door, cut out the plastic leaving a few inches of over hang to wrap inside and attach.
Step 5 – Adding the Door
Before you cut your pieces, check the actual measurements for the space you have. Your wall may sit a little different than mine. It’s always better to go a little small or your door may not fit. But if the measurements are the same, cut the following pieces out of your 12’ 2x4s:
- (2) 4’11″
- (2) 3’9″
Nail these together to make your door frame. Lay a 2×4 diagonally across the frame and nail in place. Trim off anything that hangs over the frame of the door. This will be on the inside of your door. Too much wood hanging over will jam your door. Attach the hinges to the door frame.
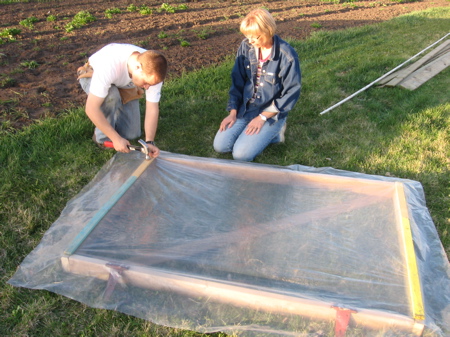
Cover the outside of the door with remaining plastic or you can use plywood if you would rather. You can attach the plastic with the wood lathe or staples. There should be about 4” of overhang of plastic on all sides.
Attach the door handles to the door. Mount the door to the frame.
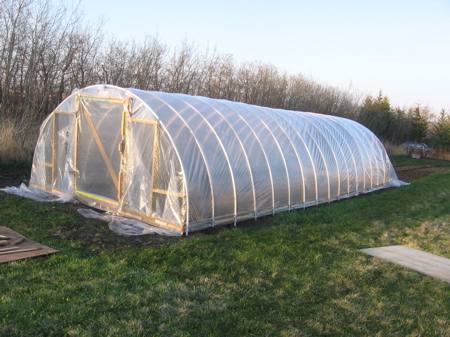
And there you go! You can have a beautiful 12’x32’ hoop-style greenhouse that can be built in a weekend and all for less than $400.
No comments:
Post a Comment